Creating Basic Animation
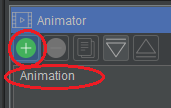
First add an animation clicking on the "+" symbol. The new animation will be created and appear in white:

Note: Double clicking on the animation name will enable editing of the name.
Selecting the "Animation" the Object "Camera" and the first Key Frame will be displayed:

“Key Frame 1” will have taken the screen position/location from when the animation was created (this is also the same when you add Key Frames) although moving the view window position and clicking the camera icon:
![]() will assign the new position to the selected Key Frame.
will assign the new position to the selected Key Frame.
Clicking the "+" symbol adds another Key Frame which has the position/location taken from the current view window (can be changed as above using the camera icon):

Once the animation creation is complete a video or collection of pictures can be generated for viewing within a standalone picture or video viewer.
Select the Record animation icon:
![]()
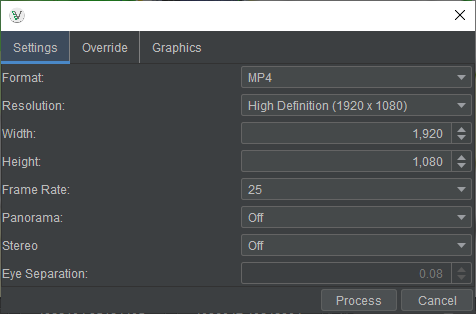
When generating a movie file or multiple picture files you can select a number of options to produce the best output for your requirements:

These options are discussed in detail in the advanced animator section.
Select "Process" with the default settings to generate a 1080p video at 25 frames and select the directory and file name to save it to. Whilst generating a bar will move backwards and forwards across the bottom of the screen to indicate processing activity.